Showing posts with label make. Show all posts

Monday, September 22, 2008

How to Make an Elf Tree Skirt

[mined the net again, here's directions for making an elf tree skirt from http://swapatorium.blogspot.com archives and a 1969 magazine!]

Pixie Elf Tree Skirt

Poopscape here and I’m feelin’ all festivey and stuff. For this project, I referred back to my pile of old Pack O Fun magazines for craft inspiration. This time my eye was caught by the pixie-elf tree skirt project in the centerfold of the December 1969 issue. Second choice: That scary, tray-carrying Santa on the cover. Maybe next year.
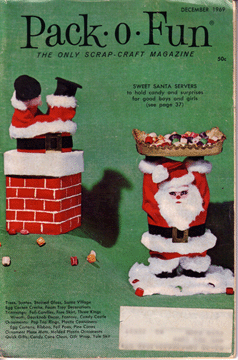
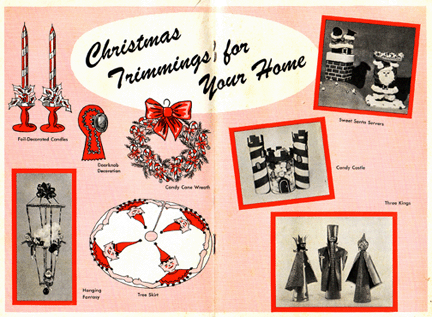
Why does a tree need a skirt? Well, without one you’re stuck looking at the tree stand which, let’s face it, is more functional than decorative and needs covering up. For years I used an old bedsheet as a tree skirt (you can see a bit of it in the image below), which I would fluff up to look like a snow drift, and not a very convincing one at that. When I saw the tree skirt with its happy little foursome of elves with bad haircuts, I knew the sheet had had its day.

The pattern for the tree skirt was a mere 36″ wide- and that’s just not big enough- so I made the skirt almost twice as big because my tree is a monster (which also meant that I needed to make a few more elves to fill the space). I used glittery chartreuse felt for the skirt, magenta felt for the elves’ hats and collars, cream felt for the fleshy bits, and black for their hair.
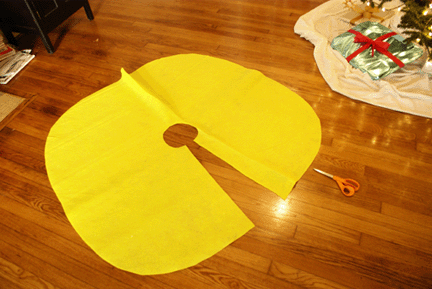
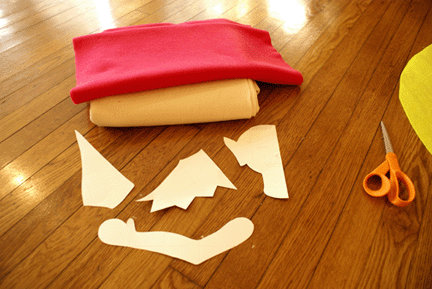
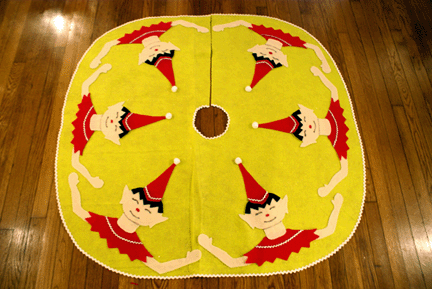
I could have gone with more traditional Christmas colors I guess, but I had to create my own perverse take on green and red. I hotglued silver rickrack to the elves’ costumes, white rickrack around the edges of the tree skirt and white pom poms on the tips of their pointy hats. It looked way too unfinished without all that stuff on it. The rickrack totally makes it.
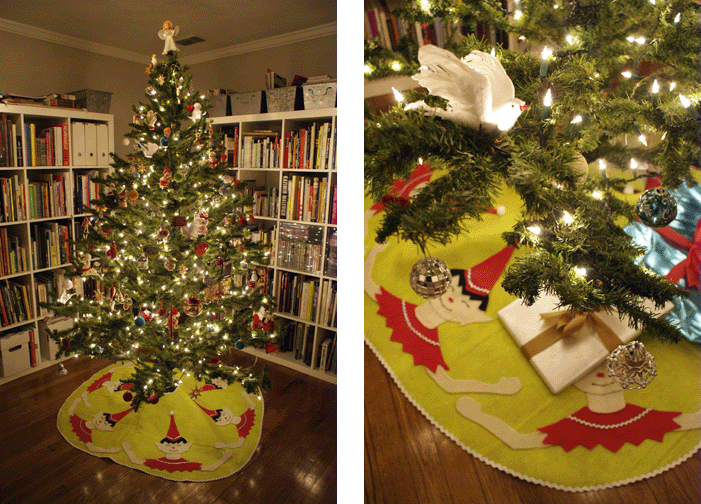
The verdict? Much, much better than that pathetic white sheet. Merry Christmas, Swapatori!

Friday, August 29, 2008

Another on-going project!

My Christmas Tree skirt!
Starlight mints!(my Favorite) I have many more mints to make. I'm hand-stitching everything so it's taking me awhile to get it done!So far so good!

Thursday, August 21, 2008

My first project - the first finshed ornaments


I have other 'gingerbread' ornaments I'm working on but these were my first few. Finished but missing hangers. I can't wait 'til I get to the snowflakes!

Another great how to from eHow

How to Make Gingerbread Cookies

How to Make Gingerbread Cookies

Introduction

Gingerbread has become synonymous with Christmas. This year, try baking your own gingerbread cookies.

Instructions

Difficulty: Moderately Easy

Steps

Step One

Gather ingredients. You will need 5 c. sifted all-purpose flour, 1 tsp. ground cinnamon, 2 tsp. baking powder, 1 1/2 tsp. each ground ginger and ground cloves, 1 tsp. baking soda, 1 tsp. ground nutmeg, 1 tsp. salt, 2 sticks unsalted butter, 1 c. sugar, 2 eggs, 1 c. molasses, and 2 tbsp. water.

Step Two

Mix butter and sugar until creamy.

Step Three

Add eggs, molasses and water. Mix well.

Step Four

Mix the dry ingredients together.

Step Five

Blend the dry ingredients into the butter mixture.

Step Six

Chill for at least three hours or overnight.

Step Seven

Roll out dough onto lightly floured cookie sheet.

Step Eight

Using cookie cutters, cut out shapes.

Step Nine

Place cookies about an inch apart on the cookie sheet and bake for five minutes at 375 degrees.

Step Ten

Cool on rack and then decorate cookies.

Tips & Warnings

  • There are many variations on the gingerbread recipe. This one is a basic way to get started. Add more ginger and cinnamon for spicier cookies, more sugar for sweeter cookies, or more butter or shortening for moister cookies.

Overall Things You'll Need

Wednesday, August 20, 2008

How to from ehow.com

Ginberbread Man

Gingerbread Man

Introduction

I love Christmas and there are so many crafts you can do with the kids from toddlers and up like paper gingerbread men!

Instructions

Difficulty: Easy

Things You'll Need

Steps

Step One

cut out a gingerbread man shape with brown construction paper.

Step Two

cut out a larger gingerbread man with red construction paper with scissors that have zig zag or deckle edges.

Step Three

Have the kids glue the brown gingerbread man on top of the red gingerbread man

Step Four

Bring out different craft pieces like googly eyes, stickers, piper cleaners and buttons.

Step Five

You can also cut out eyes or pieces to make a vest and shorts or color with markers.

Step Six

Decorate and get creative! You can add glitter, cut a hole on top and make yarn loop and hang on the tree or window.

Overall Tips & Warnings

  • When doing crafts with toddlers this is a great time to encourage independence and creativity and simple crafts like this gingerbread man give you just that opportunity to let them go on their own.
  • Make sure you are using safety scissors if you allow them to cut any part of the craft.

Thursday, August 14, 2008

My Christmas Craft Projects!

Here's a photo of all my supplies for the upcoming Christmas season! There will be some stamping, ornaments, a cookie plate for Santa. I don't know what I'm doing with the ribbon, I just thought it was cute!! I have other supplies but they wouldn't fit!! I'll post photos when I finish something!

Saturday, August 9, 2008

how to from BHG.com


Make a Ribbon Candy Twist Ornament

Wow family and friends with these handcrafted retro ribbon candy styled ornaments.

What You Need
  • Spray adhesive
  • Wide, medium, and narrow ribbon
  • Water-soluble marking pen
  • Long-eye beading needle
  • White embroidery floss
  • Eleven 10-mm-round pearls

How to Make It
  1. Glue the medium-width ribbon to the center of the wide ribbon.
  2. Trim the length to measure 16 1/2 inches.
  3. Using the pen and a ruler, mark dots down the center of the ribbon at 1-1/2-inch intervals on both sides of the ribbon.
  4. Thread the beading needle with an 18-inch length of embroidery floss.
  5. Slip a pearl onto the floss.
  6. Carefully remove the needle, and then rethread it with both ends of the floss. The ends of the floss should be even.
  7. Push the needle from one side of the ribbon through the other side at the first mark (the first pearl is now at the bottom of the ornament); add a pearl.
  8. Push the needle from the one side of the ribbon through to the other side at the second mark; add a pearl.
  9. Continue until you have 11 pearls on the string.
  10. To finish, secure the thread and attach a hanging ribbon.

[BLOGGER'S TIP: Use Heat n' Bond adhesive to fuse ribbons together. Gives more weight and body to ribbon strip and you can delete the use of beads if you don't like the look! You can also use striped fabric fused together with Heat n' Bond and then make long strips to fold into ornaments!]