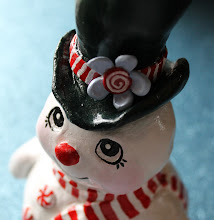
Year 2 - I have just started the second year of working on our family's tree skirt! I am about 1/3 of the way done with making the peppermint swirls, they are all hand sewn so it's taking awhile. It's also about 54" round so I need a whole bunch of them!! After I finally finish the swirls, I have to attach them to the skirt and then finish it up. My hopes are that I will have it finished by Christmas 2009...We'll see, I'll keep you posted!:o)
Showing posts with label Christmas Tree. Show all posts
Showing posts with label Christmas Tree. Show all posts
Thursday, January 15, 2009
Our Family's Christmas Tree Skirt
Year 2 - I have just started the second year of working on our family's tree skirt! I am about 1/3 of the way done with making the peppermint swirls, they are all hand sewn so it's taking awhile. It's also about 54" round so I need a whole bunch of them!! After I finally finish the swirls, I have to attach them to the skirt and then finish it up. My hopes are that I will have it finished by Christmas 2009...We'll see, I'll keep you posted!:o)


Tuesday, December 16, 2008
my christmas tree


Finally it is up! Still a work in progress, I'm trying to get the tree skirt done before Christmas!!
I will be working on a tree topper over the next year!
(I'm thinking angel, but we'll see where inspiration takes me!)
If you look closely you can see some of the felt ornaments.
If you look closely you can see some of the felt ornaments.
Sunday, December 14, 2008
Tips on Decorating Your Christmas Tree - What To Do First

[I had to find this article today because I'm finally getting my tree up this weekend. Normally, I like to have it up the weekend after Thanksgiving but between traveling, my etsy shops picking up and prepping for a craft show, this is the soonest I could manage. I always thought garland went on last but followed this instruction last year and it went pretty well. The big question is how a 17 month old will act with a decorated tree. I'll keep you posted!]
----------------------------------------------------------------------------------------------------
You've chosen your perfect Christmas tree, but now what?
Our tips on the next pages will give you ideas for setting up your tree, lighting it, keeping it fresh, and decorating it to be beautiful.
- Keep Your Tree Fresh and Green
Cut the stump of the tree with a fresh cut and set it in water immediately. A fresh-cut tree will absorb several quarts of water right from the start. So it's important to check and refill the water level several times a day for the first week. You can cut down on frequency later. Be sure to place you Christmas tree in a stand that has a large water reservoir and keep it filled. - Christmas Tree Preservative
You can prolong the life of your Christmas tree by mixing up a concoction of 1 quart water, 1/2 cup light corn syrup, and 1 teaspoon liquid bleach. You can also read information on caring for Christmas trees. - Putting Lights and Decorations on the Tree
When decorating your Christmas tree, put lights on first, then garlands, then the ornaments. - Work From the Inside Out
Start arranging Christmas tree lights on the branches near the base of the tree. Weave strings of lights along the branches "inside," then move to the outer edges of the branches. - Placement of Ornaments
Don't hang all your ornament on the tips of the branches. Place ornaments and other decorations 'inside' your tree to add depth and interest. - Basic Ornaments for Fill
Start by arranging the "filler ornaments" evenly spaced around the tree. This would include basic solid color balls that are easily found at discount stores in a wide range of colors to coordinate and enhance your decorating scheme. You'll need about 20 "filler ornaments" for every 2 feet of Christmas tree. - Special Themed, Collectible Ornaments
Mix one-of-a-kind special ornaments between the basic ornaments. Plan to use at least 10 special themed ornaments for every 2 feet of tree. As your collection grows, put the special ornaments closer together.
Thursday, October 23, 2008


Tuesday, October 14, 2008
All My Completed Christmas Projects
Okay, here are the final results of some of my projects. It’s a slow go but I’m getting there!!


Ribbon Candy in progress


Thursday, October 9, 2008


Wednesday, October 8, 2008
Elf Ornament

^Okay if you remember, this was the inspiration^
Here are images of my elf ornament in progress.
[I'll try to edit this with directions when I'm finished. Hopefully I'll be able to make some patterns!]
Here are images of my elf ornament in progress.
[I'll try to edit this with directions when I'm finished. Hopefully I'll be able to make some patterns!]


Monday, September 29, 2008
how to make peppermint candy ornaments
Peppermint Ornament

If you like painting, you will enjoy making these scrumptious looking peppermint ornaments.
Materials:
- 3 1/2" Paper Mache disk
- All purpose sealer *
- Acrylic paint - red & white
- Pink paint - either fabric paint in a squeeze bottle or acrylic paint
- Paint brush
- Thin ribbon
- Clear cellophane
*Can be found where acrylic paints are sold
1) Paint the entire disk with all purpose sealer and let dry completely
2) Paint the whole ornament white. It may be easier to paint one side and the edges, let dry and flip it over and paint the second side. Once completely painted, let dry thoroughly.
3) Using a pencil, draw very light lines on one side of the disk as pictured below. You will be drawing six curved lines.

4) Once the lines are drawn on one side of the disk, continue them onto the side of the ornament. Then, draw the same lines onto the back but be sure they line up with the lines on the side.
5) You now have six sections on each side of the disk. On one side of the disk, paint every other section red. You will have a pattern of alternating red and white sections. Let dry completely then continue the paint onto the corresponding side sections and then onto the other side of the disk. Once dry, apply another coat of paint if necessary then let dry completely.
6) Paint white dots on the red sections. An easy way to do this is to dip the end (not the bristle end) of a paint brush into white paint then touch it to where you want the dot. Reload the paint after every one or two dots. Paint a big white dot in the center of the peppermint where the swirls come together. Paint squiggly pink lines down the center of the white sections. Let both sides dry completely before continuing.
7) Cut a 9" square of cellophane and wrap it around your peppermint cutting a small hole and threading the hanging string through the hole. Gather the extra cellophane on both sides of the peppermint and tie each side with an 8" piece of thin ribbon as pictured.

Our green peppermint was made slightly different than the red and white one. I made four sections each of green and white instead of three each. While the green paint was still wet I sprinkled Glamour Dust (a very fine glitter) on it then made a big red dot in the middle of the ornament and little red dots on the white and finally tied the cellophane with gold ribbon.
elf ornaments
[Here are a couple of craft projects mined off of the net. Above is a cute ornament I found a picture of on Flickr, I will try to come up with directions on how to make it when time permits!! There should be links back to the original sites on all the photos, if not please let me know because I believe in giving props to those who have created all the little lovelies I find!!]

Activa Elf Ornament This little guy will add a touch of holiday whimsy to your tree. Designed by Jill MacKay
4” Roll of Rigid Wrap®
3 “ Styrofoam Egg
Red Glitter
Red Pom-Pom
Acrylic Paint: Red, Green, Peach and Black
Piece of Craft Cord- 6”
Paintbrush
Glue
Container for Water
Plastic to Cover Workspace
Scissors
Cut several strips of Rigid Wrap® (RW) of various sizes ranging from
½” to 1 ½”, Cut one 8” long strip.
Make a loop with the cord and have the cord ends facing each other,
lying next to each other. Using smaller pieces of RW to secure the ends
of cord to top of egg. Then continue on and cover the entire egg with a
layer RW. For hat band, cut the 8” piece of RW in half length-wise.
Next fold the piece in half length-wise, dip in water and place around
head (egg) and smooth. For ears and nose scrunch up a wet piece of
RW and shape with finger tips, press in place, and smooth.
Hang to dry.
Paint head and face while holding hat, let dry.
Paint hat while holding face, let dry.
Trim hat band with glue and glitter let dry.
While hanging glue pom-pom to top of hat.
Let dry
Tip: Make a place to hang your ornament at your workspace,
so it can hang to dry in-between the different steps
|
|
Felt Elf Christmas Ornament

Red Felt; 4″ x 7″ piece
Green Felt; 4 1/2″ x 2″ piece
Flesh colored felt: 3 1/2″ x 9″ piece
One 10mm bell
One 5mm pink pom-pom
Two black glass E beads
Tacky glue
Small amount Polyester Fiberfill (stuffing)
8″ piece of elastic thread or crochet thread
Powdered blush
Ultra fine tip black permanent marker
Needle & thread
optional: sewing machine and gold glitter glue
or fabric paint in a squeeze bottle
Trace and cut out two hat pieces from red felt.
Trace and cut out one collar piece from green felt and
trace and cut out two heads from flesh colored felt.
Pin the two head pieces together and sew around the
face close to the edge leaving the top section opened.
Topstitch around the ears.
Stuff the head with Polyester Fiberfil (stuffing).
Only the face will be stuffed - the ears will not get stuffed.
Then, sew the opening at the top of the head closed. Set aside.
Pin the two hat sections together and stitch the two sides
close to the edge leaving the bottom edge opened.
Right side out the hat and place it on top of the elf’s head.
Stitch in place.
Fold down the top of the hat as pictured and tack
in place with a couple of stitches on the back side of the ornament.
Sew a bell to the tip of the hat.
Hand-stitch the collar to the lower portion of the head.
Brush powdered blush on the cheeks of the elf.
Sew the two black beads on for eyes. Glue the pink
pom-pom on as the nose and using the permanent marker,
draw a mouth.
Thread a piece of elastic thread or crochet thread
through the back of the elf’s hat using a needle with
an eye large enough to pass the thread through.
Remove the needle and tie the ends in an overhand knot.
This will be your ornament’s hanger.
Optional: Personalize your ornament by writing the recipients
name on the collar using the glitter glue or fabric paint in a squeeze bottle.

Monday, September 22, 2008
How to Make an Elf Tree Skirt
[mined the net again, here's directions for making an elf tree skirt from http://swapatorium.blogspot.com archives and a 1969 magazine!]
Pixie Elf Tree Skirt
Poopscape here and I’m feelin’ all festivey and stuff. For this project, I referred back to my pile of old Pack O Fun magazines for craft inspiration. This time my eye was caught by the pixie-elf tree skirt project in the centerfold of the December 1969 issue. Second choice: That scary, tray-carrying Santa on the cover. Maybe next year.
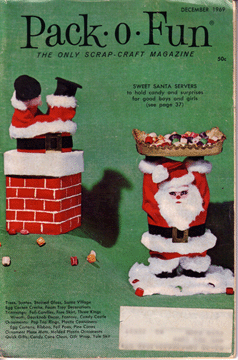
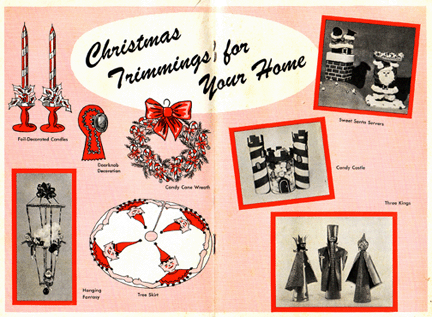
Why does a tree need a skirt? Well, without one you’re stuck looking at the tree stand which, let’s face it, is more functional than decorative and needs covering up. For years I used an old bedsheet as a tree skirt (you can see a bit of it in the image below), which I would fluff up to look like a snow drift, and not a very convincing one at that. When I saw the tree skirt with its happy little foursome of elves with bad haircuts, I knew the sheet had had its day.
The pattern for the tree skirt was a mere 36″ wide- and that’s just not big enough- so I made the skirt almost twice as big because my tree is a monster (which also meant that I needed to make a few more elves to fill the space). I used glittery chartreuse felt for the skirt, magenta felt for the elves’ hats and collars, cream felt for the fleshy bits, and black for their hair.
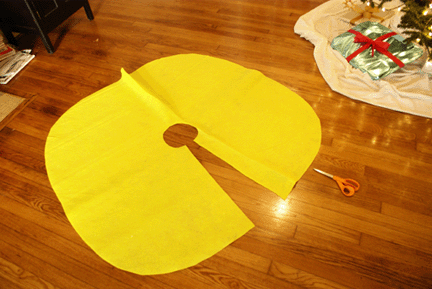
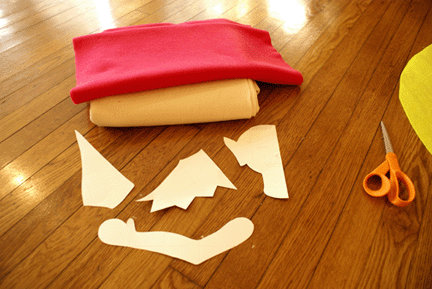
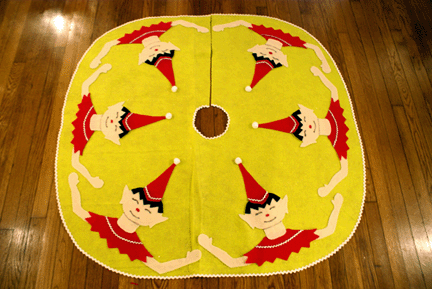
I could have gone with more traditional Christmas colors I guess, but I had to create my own perverse take on green and red. I hotglued silver rickrack to the elves’ costumes, white rickrack around the edges of the tree skirt and white pom poms on the tips of their pointy hats. It looked way too unfinished without all that stuff on it. The rickrack totally makes it.
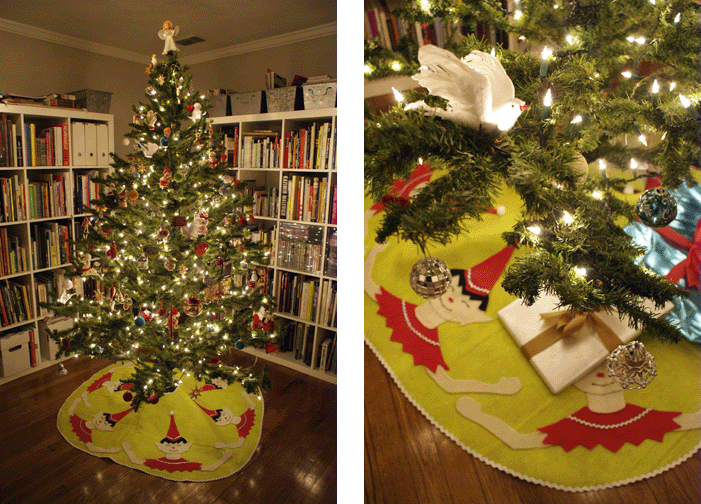
The verdict? Much, much better than that pathetic white sheet. Merry Christmas, Swapatori!
Tuesday, September 9, 2008
New Christmas Blog!

While laying in bed I had the idea for a new Christmas blog. This one will remain exactly the way it is; the new blog is called "Ghost of Christmas Yet to Come-Reviving the Spirit of Christmas". I hope to examine what happened to the sense of wonder that used to surround Christmas and how we might rekindle it in our own families and communities. There used to be an electric charge in the air, people were filled with good cheer, even when out shopping. Now that is different. I worked in retail management and I've seen it first hand. There still are merry, wonderful people out at Christmastime, but they are fewer and farther between! Thus the reason for the new blog. Less warm and fuzzy on the surface but hopefully it will become a tool to help us change our world for the better and revive the true giving spirit of Christmas by changing ourselves and our place in it.
Monday, September 8, 2008
Family Traditions

My little one is still too young to really get excited about Christmas, so I am planning our family traditions now while he is so young in hopes that he will acquire the sense of wonder that I had when I was young. I absolutely loved Christmas preparations, decking the halls and baking so many yummy treats. My Aunt Nancy used to make Christmas cookies. She had gingerbread men, peanut butter blossoms, butter balls(russian tea cakes) and my personal favorite, iced sugar cookies with dragees decorating them. My mother always prepared my paternal grandmother's nut roll recipe. She would make raspberry, apricot, poppy seed and traditional walnut all frosted with yummy vanilla frosting. My mom also had these white feather wreaths she hung on the living room wall, porcelain angels that would hang on the lamps and these strange lantern-like gold garlands that would drape acro
 ss the windows. We always had to have an artificial tree because my mom was allergic to the real ones. My fondest decoration was the plastic, glittery candy garland that used to hang in the kitchen doorway. Oh and then there were also the little plastic elves that everyone seemed to have. We always opened one gift on Christmas eve then we would go to bed and Santa Claus would come and leave us more presents. We always woke up early to see what Santa brought and then we would go to church. As we got older we would start going to midnight mass. My maternal grandmother was born on Christmas day so she would come over every year for dinner which usually included a ham with all the fixings. My husband's family really didn't have any strong traditions, the only thing he remembers are the handmade felt ornaments his aunt use to make. Those and this odd family concoction called hamloaf!? I have the recipe, I just don't know if that is one tradition I want to encourage! :o) Over the next few months, I hope to share our traditions as well as some of my friend's and fellow Christmas lovers!(and if I can dig out the old Stamblesky nut roll recipe, I might just share that too!)
Subscribe to:
Posts (Atom)