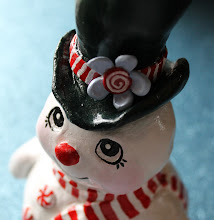
Year 2 - I have just started the second year of working on our family's tree skirt! I am about 1/3 of the way done with making the peppermint swirls, they are all hand sewn so it's taking awhile. It's also about 54" round so I need a whole bunch of them!! After I finally finish the swirls, I have to attach them to the skirt and then finish it up. My hopes are that I will have it finished by Christmas 2009...We'll see, I'll keep you posted!:o)
Showing posts with label craft. Show all posts
Showing posts with label craft. Show all posts
Thursday, January 15, 2009
Our Family's Christmas Tree Skirt
Year 2 - I have just started the second year of working on our family's tree skirt! I am about 1/3 of the way done with making the peppermint swirls, they are all hand sewn so it's taking awhile. It's also about 54" round so I need a whole bunch of them!! After I finally finish the swirls, I have to attach them to the skirt and then finish it up. My hopes are that I will have it finished by Christmas 2009...We'll see, I'll keep you posted!:o)


Sunday, November 9, 2008


Wednesday, October 8, 2008
Elf Ornament

^Okay if you remember, this was the inspiration^
Here are images of my elf ornament in progress.
[I'll try to edit this with directions when I'm finished. Hopefully I'll be able to make some patterns!]
Here are images of my elf ornament in progress.
[I'll try to edit this with directions when I'm finished. Hopefully I'll be able to make some patterns!]


Monday, September 29, 2008
how to make peppermint candy ornaments
Peppermint Ornament

If you like painting, you will enjoy making these scrumptious looking peppermint ornaments.
Materials:
- 3 1/2" Paper Mache disk
- All purpose sealer *
- Acrylic paint - red & white
- Pink paint - either fabric paint in a squeeze bottle or acrylic paint
- Paint brush
- Thin ribbon
- Clear cellophane
*Can be found where acrylic paints are sold
1) Paint the entire disk with all purpose sealer and let dry completely
2) Paint the whole ornament white. It may be easier to paint one side and the edges, let dry and flip it over and paint the second side. Once completely painted, let dry thoroughly.
3) Using a pencil, draw very light lines on one side of the disk as pictured below. You will be drawing six curved lines.

4) Once the lines are drawn on one side of the disk, continue them onto the side of the ornament. Then, draw the same lines onto the back but be sure they line up with the lines on the side.
5) You now have six sections on each side of the disk. On one side of the disk, paint every other section red. You will have a pattern of alternating red and white sections. Let dry completely then continue the paint onto the corresponding side sections and then onto the other side of the disk. Once dry, apply another coat of paint if necessary then let dry completely.
6) Paint white dots on the red sections. An easy way to do this is to dip the end (not the bristle end) of a paint brush into white paint then touch it to where you want the dot. Reload the paint after every one or two dots. Paint a big white dot in the center of the peppermint where the swirls come together. Paint squiggly pink lines down the center of the white sections. Let both sides dry completely before continuing.
7) Cut a 9" square of cellophane and wrap it around your peppermint cutting a small hole and threading the hanging string through the hole. Gather the extra cellophane on both sides of the peppermint and tie each side with an 8" piece of thin ribbon as pictured.

Our green peppermint was made slightly different than the red and white one. I made four sections each of green and white instead of three each. While the green paint was still wet I sprinkled Glamour Dust (a very fine glitter) on it then made a big red dot in the middle of the ornament and little red dots on the white and finally tied the cellophane with gold ribbon.
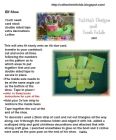
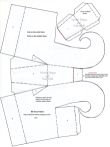
A great idea from valitasfreshfolds.blogspot.com- Elf Shoe
[this craft was designed by valita's designs & fresh folds. Very talented lady, check out her blog for more ideas and inspiration!]
Elf Shoes


Monday, September 22, 2008
How to Make an Elf Tree Skirt
[mined the net again, here's directions for making an elf tree skirt from http://swapatorium.blogspot.com archives and a 1969 magazine!]
Pixie Elf Tree Skirt
Poopscape here and I’m feelin’ all festivey and stuff. For this project, I referred back to my pile of old Pack O Fun magazines for craft inspiration. This time my eye was caught by the pixie-elf tree skirt project in the centerfold of the December 1969 issue. Second choice: That scary, tray-carrying Santa on the cover. Maybe next year.
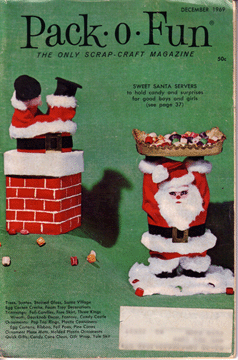
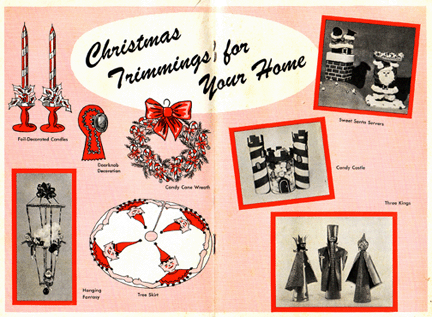
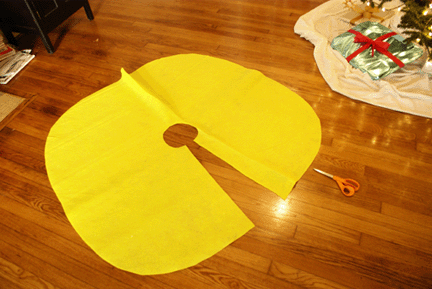
Why does a tree need a skirt? Well, without one you’re stuck looking at the tree stand which, let’s face it, is more functional than decorative and needs covering up. For years I used an old bedsheet as a tree skirt (you can see a bit of it in the image below), which I would fluff up to look like a snow drift, and not a very convincing one at that. When I saw the tree skirt with its happy little foursome of elves with bad haircuts, I knew the sheet had had its day.
The pattern for the tree skirt was a mere 36″ wide- and that’s just not big enough- so I made the skirt almost twice as big because my tree is a monster (which also meant that I needed to make a few more elves to fill the space). I used glittery chartreuse felt for the skirt, magenta felt for the elves’ hats and collars, cream felt for the fleshy bits, and black for their hair.
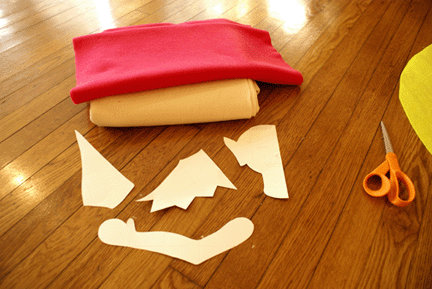
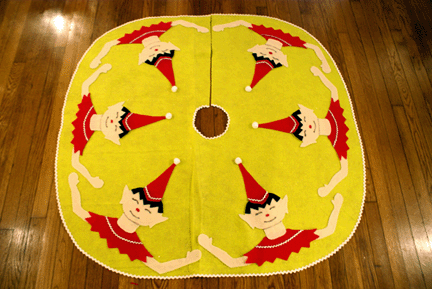
I could have gone with more traditional Christmas colors I guess, but I had to create my own perverse take on green and red. I hotglued silver rickrack to the elves’ costumes, white rickrack around the edges of the tree skirt and white pom poms on the tips of their pointy hats. It looked way too unfinished without all that stuff on it. The rickrack totally makes it.
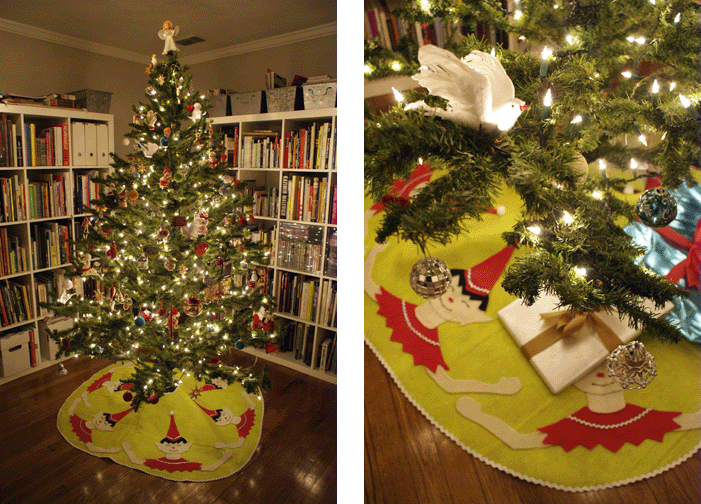
The verdict? Much, much better than that pathetic white sheet. Merry Christmas, Swapatori!
Friday, August 29, 2008
Another on-going project!
 My Christmas Tree skirt!
Starlight mints!(my Favorite) I have many more mints to make. I'm hand-stitching everything so it's taking me awhile to get it done!So far so good!
Thursday, August 21, 2008
My first project - the first finshed ornaments

 I have other 'gingerbread' ornaments I'm working on but these were my first few. Finished but missing hangers. I can't wait 'til I get to the snowflakes!
Wednesday, August 20, 2008
How to from ehow.com


Gingerbread Man
Introduction
I love Christmas and there are so many crafts you can do with the kids from toddlers and up like paper gingerbread men!
Instructions
Difficulty: Easy
Things You'll Need
- brown constructions paper
- red construction paper
- hole punch
- stickers
- markers or crayons
- glue
- glitter
- yarn
Steps
Step One
cut out a gingerbread man shape with brown construction paper.
Step Two
cut out a larger gingerbread man with red construction paper with scissors that have zig zag or deckle edges.
Step Three
Have the kids glue the brown gingerbread man on top of the red gingerbread man
Step Four
Bring out different craft pieces like googly eyes, stickers, piper cleaners and buttons.
Step Five
You can also cut out eyes or pieces to make a vest and shorts or color with markers.
Step Six
Decorate and get creative! You can add glitter, cut a hole on top and make yarn loop and hang on the tree or window.
Overall Tips & Warnings
- When doing crafts with toddlers this is a great time to encourage independence and creativity and simple crafts like this gingerbread man give you just that opportunity to let them go on their own.
- Make sure you are using safety scissors if you allow them to cut any part of the craft.
Thursday, August 14, 2008
My Christmas Craft Projects!
 Here's a photo of all my supplies for the upcoming Christmas season! There will be some stamping, ornaments, a cookie plate for Santa. I don't know what I'm doing with the ribbon, I just thought it was cute!! I have other supplies but they wouldn't fit!! I'll post photos when I finish something!
Saturday, August 9, 2008
how to from BHG.com

Make a Ribbon Candy Twist Ornament
Wow family and friends with these handcrafted retro ribbon candy styled ornaments.
What You Need
- Spray adhesive
- Wide, medium, and narrow ribbon
- Water-soluble marking pen
- Long-eye beading needle
- White embroidery floss
- Eleven 10-mm-round pearls
How to Make It
- Glue the medium-width ribbon to the center of the wide ribbon.
- Trim the length to measure 16 1/2 inches.
- Using the pen and a ruler, mark dots down the center of the ribbon at 1-1/2-inch intervals on both sides of the ribbon.
- Thread the beading needle with an 18-inch length of embroidery floss.
- Slip a pearl onto the floss.
- Carefully remove the needle, and then rethread it with both ends of the floss. The ends of the floss should be even.
- Push the needle from one side of the ribbon through the other side at the first mark (the first pearl is now at the bottom of the ornament); add a pearl.
- Push the needle from the one side of the ribbon through to the other side at the second mark; add a pearl.
- Continue until you have 11 pearls on the string.
- To finish, secure the thread and attach a hanging ribbon.
Subscribe to:
Posts (Atom)