Showing posts with label how to. Show all posts

Sunday, December 14, 2008

Tips on Decorating Your Christmas Tree - What To Do First


[I had to find this article today because I'm finally getting my tree up this weekend. Normally, I like to have it up the weekend after Thanksgiving but between traveling, my etsy shops picking up and prepping for a craft show, this is the soonest I could manage. I always thought garland went on last but followed this instruction last year and it went pretty well. The big question is how a 17 month old will act with a decorated tree. I'll keep you posted!]

----------------------------------------------------------------------------------------------------

(From About.com)

You've chosen your perfect Christmas tree, but now what?

Our tips on the next pages will give you ideas for setting up your tree, lighting it, keeping it fresh, and decorating it to be beautiful.

  • Keep Your Tree Fresh and Green
    Cut the stump of the tree with a fresh cut and set it in water immediately. A fresh-cut tree will absorb several quarts of water right from the start. So it's important to check and refill the water level several times a day for the first week. You can cut down on frequency later. Be sure to place you Christmas tree in a stand that has a large water reservoir and keep it filled.
  • Christmas Tree Preservative
    You can prolong the life of your Christmas tree by mixing up a concoction of 1 quart water, 1/2 cup light corn syrup, and 1 teaspoon liquid bleach. You can also read information on caring for Christmas trees.
  • Putting Lights and Decorations on the Tree
    When decorating your Christmas tree, put lights on first, then garlands, then the ornaments.
  • Work From the Inside Out
    Start arranging Christmas tree lights on the branches near the base of the tree. Weave strings of lights along the branches "inside," then move to the outer edges of the branches.
  • Placement of Ornaments
    Don't hang all your ornament on the tips of the branches. Place ornaments and other decorations 'inside' your tree to add depth and interest.
  • Basic Ornaments for Fill
    Start by arranging the "filler ornaments" evenly spaced around the tree. This would include basic solid color balls that are easily found at discount stores in a wide range of colors to coordinate and enhance your decorating scheme. You'll need about 20 "filler ornaments" for every 2 feet of Christmas tree.
  • Special Themed, Collectible Ornaments
    Mix one-of-a-kind special ornaments between the basic ornaments. Plan to use at least 10 special themed ornaments for every 2 feet of tree. As your collection grows, put the special ornaments closer together.

Thursday, December 11, 2008

Cute Sugar Cookie Lights


  • Prep Time: 10 min.
  • Bake Time: 45 min.
  • Difficulty: Moderate
  • Yield: Makes 18 cookies.

ingredients

  • 4 cups M&M’S® Brand Minis Chocolate Candies
  • 1 18 oz. roll refrigerated sugar cookie dough
  • 2/3 cup flour
  • 1 16 oz. can vanilla frosting
  • 1 14 oz. package red licorice laces
  • Resealable plastic bags
  • Drinking straw
  • Christmas light shaped cookie cutter

directions

  • 1. Preheat oven to 350°F.
  • 2. Knead the flour into the cookie dough until smooth.
  • 3. Roll the dough out to 1/4-inch thickness. By hand, or using a Christmas light cookie cutter, cut out shapes.
  • 4. With a spatula, gently transfer the cookies to a baking sheet. Using a drinking straw, press a hole at the top of each cookie.
  • 5. Bake for 15 minutes. Transfer to a wire rack and let cool completely.
  • 6. Separate different colors of M&M’S® Brand Minis Chocolate Candies, and set aside.
  • 7. Spread vanilla frosting on top of each cookie. Arrange a solid color of M&M’S® Brand Minis Chocolate Candies on top of each cookie.
  • 8. Let the cookies dry for 30 minutes. Run licorice laces through each hole, connecting the cookies into one continuous strand.

Friday, November 21, 2008

Beaded Snowflake Ornament

[from Better Homes and Gardens]

The light will dance on these wintertime snowflakes, made from a variety of crystal-like beads.


What You Need:

For each snowflake:


Enlarge Image It's easy to make a blizzard's worth
of these sparkling snowflakes.
  • 10 corsage pins with pearl ends (available in fabric and craft stores)
  • Crystal-like beads in desired shapes and sizes
  • 1 small cork
  • Iridescent white glitter paint pen (usually used for fabric, available in craft and discount stores)
  • Monofilament thread

Instructions:

1. Add beads to 4 pins. Place beads on 1 corsage pin in desired order, leaving the last 1/4 inch without beads. Make 3 more beaded pins using the same arrangement.

2. Make another set of 4 beaded pins, using a different arrangement. Make an additional set of 2 beaded pins. (You should have a total of 10 beaded pins.)

3. Add 4 matching pins to cork. Cut the cork, if necessary, so it is about 1/4 inch long. With the round side of the cork laying on the work surface, poke one beaded pin into the cork (close to work surface) like a spoke of a wheel. Place a matching beaded pin opposite the first. Place the remaining two opposite each other, between the first set.

4. Add remaining pins. Using the remaining set of 4 matching pins, poke each into the cork, slightly closer to the top of the cork and alternating with the first set of four. Place the remaining 2 beaded pins into each round end of the cork.

5. Cover the cork using glitter paint pen. Allow to dry. Apply a second coat, if necessary, and let dry.

6. To hang, cut a desired length of monofilament and tie to one spoke of the snowflake.

Jingle Bell Snowflakes

[From Better Homes and Gardens]

Jazz up the classic snowflake in an unexpected way using jingle bells.


What You Need
  • 16-gauge crafts wire
  • Needle-nose pliers
  • Fine crafts wire
  • Glue gun and hotmelt adhesive
  • Assorted 9-mm- to 1-inch-diameter jingle bells

How to Make It

1. Cut three 6- to 8-inch lengths of 16-gauge crafts wire.

2. Using needle-nose pliers, bend one of the wires to make a hook for hanging.

3. Cross the wire pieces in the center, wrap with fine crafts wire to secure in a spoke shape, and reinforce the wire with hot glue.


4. Hot-glue one bell over the center intersection of the wire assembly.

5. Slide bells onto each wire spoke, securing them on the back side with hot glue.


6. Trim the remaining wires.


Monday, September 29, 2008

how to make peppermint candy ornaments

Peppermint Ornament

Learn to make professional looking candy ornaments for your Christmas tree

If you like painting, you will enjoy making these scrumptious looking peppermint ornaments.

Materials:
  • 3 1/2" Paper Mache disk
  • All purpose sealer *
  • Acrylic paint - red & white
  • Pink paint - either fabric paint in a squeeze bottle or acrylic paint
  • Paint brush
  • Thin ribbon
  • Clear cellophane

*Can be found where acrylic paints are sold

1) Paint the entire disk with all purpose sealer and let dry completely

2) Paint the whole ornament white. It may be easier to paint one side and the edges, let dry and flip it over and paint the second side. Once completely painted, let dry thoroughly.

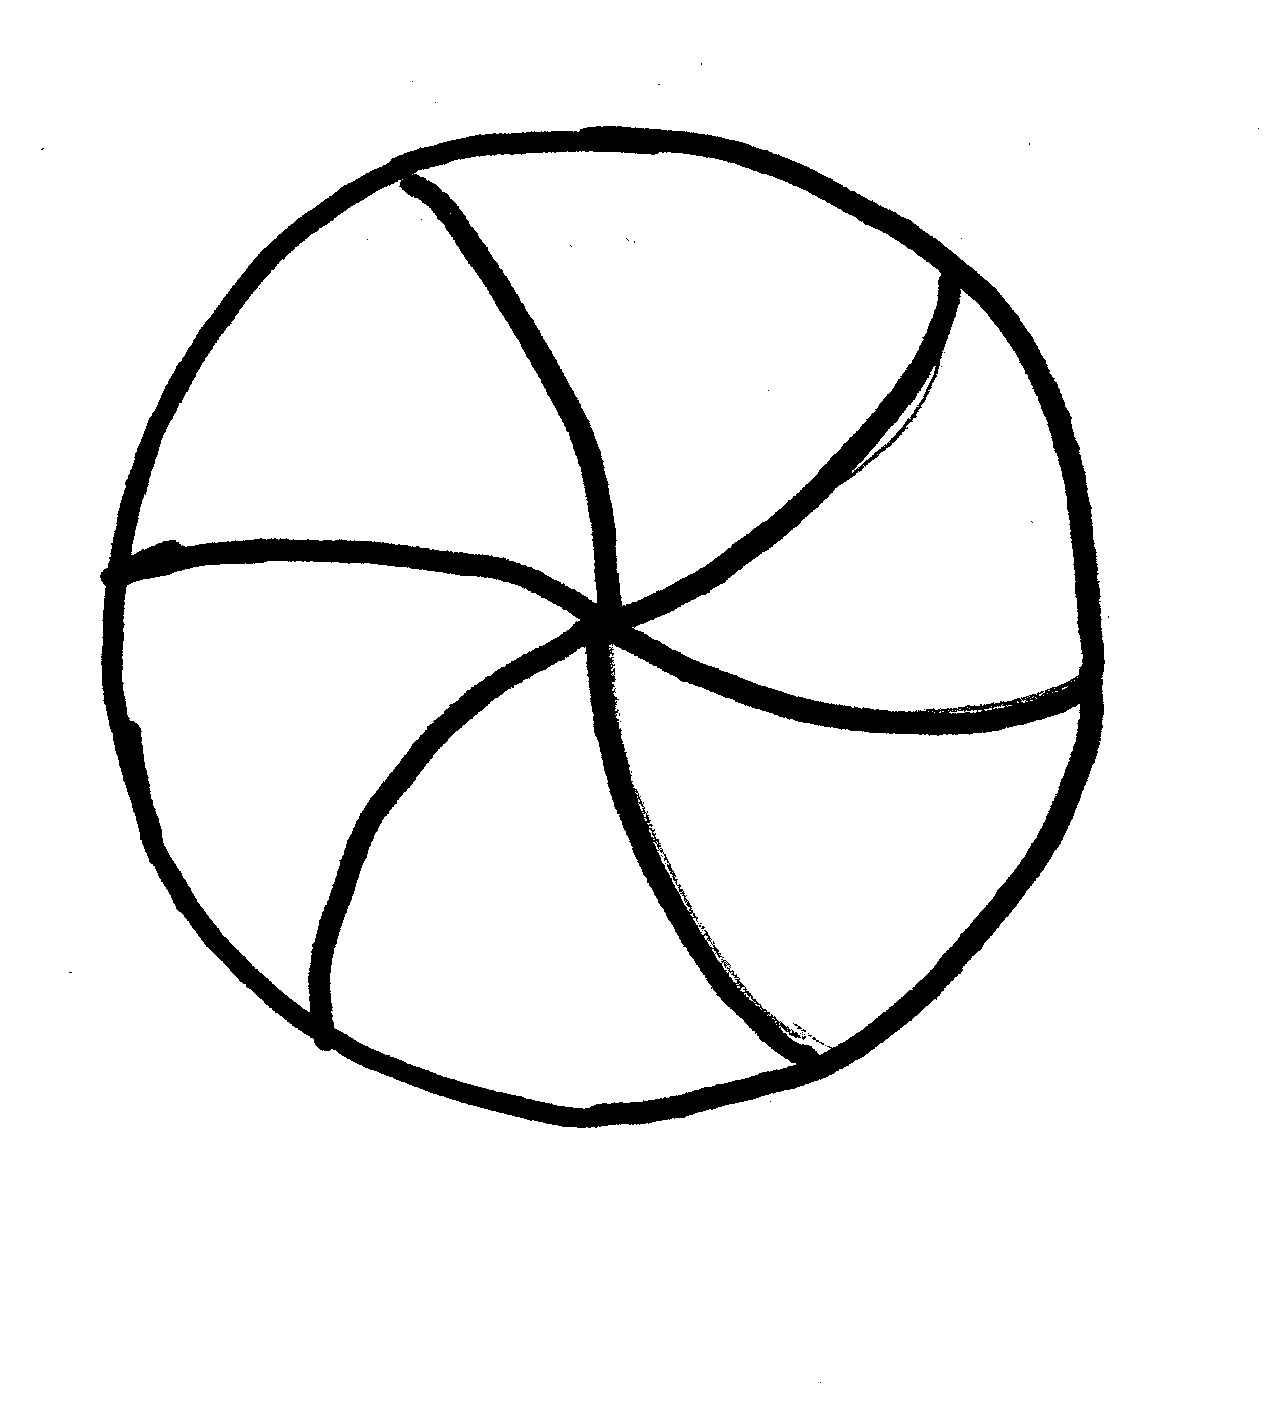
3) Using a pencil, draw very light lines on one side of the disk as pictured below. You will be drawing six curved lines.

Divide your peppermint ornament into 6 sections for painting

4) Once the lines are drawn on one side of the disk, continue them onto the side of the ornament. Then, draw the same lines onto the back but be sure they line up with the lines on the side.

5) You now have six sections on each side of the disk. On one side of the disk, paint every other section red. You will have a pattern of alternating red and white sections. Let dry completely then continue the paint onto the corresponding side sections and then onto the other side of the disk. Once dry, apply another coat of paint if necessary then let dry completely.

6) Paint white dots on the red sections. An easy way to do this is to dip the end (not the bristle end) of a paint brush into white paint then touch it to where you want the dot. Reload the paint after every one or two dots. Paint a big white dot in the center of the peppermint where the swirls come together. Paint squiggly pink lines down the center of the white sections. Let both sides dry completely before continuing.

7) Cut a 9" square of cellophane and wrap it around your peppermint cutting a small hole and threading the hanging string through the hole. Gather the extra cellophane on both sides of the peppermint and tie each side with an 8" piece of thin ribbon as pictured.

Learn to paint peppermint candy Christmas ornaments

Our green peppermint was made slightly different than the red and white one. I made four sections each of green and white instead of three each. While the green paint was still wet I sprinkled Glamour Dust (a very fine glitter) on it then made a big red dot in the middle of the ornament and little red dots on the white and finally tied the cellophane with gold ribbon.

elf ornaments

[Here are a couple of craft projects mined off of the net. Above is a cute ornament I found a picture of on Flickr, I will try to come up with directions on how to make it when time permits!! There should be links back to the original sites on all the photos, if not please let me know because I believe in giving props to those who have created all the little lovelies I find!!]

Activa Elf Ornament This little guy will add a touch of holiday whimsy to your tree. Designed by Jill MacKay

Activa Elf Ornament This little guy will add a touch of holiday whimsy to your tree. Designed by Jill MacKay

4” Roll of Rigid Wrap®

3 “ Styrofoam Egg

Red Glitter

Red Pom-Pom

Acrylic Paint: Red, Green, Peach and Black

Piece of Craft Cord- 6”

Paintbrush

Glue

Container for Water

Plastic to Cover Workspace

Scissors

Cut several strips of Rigid Wrap® (RW) of various sizes ranging from

½” to 1 ½”, Cut one 8” long strip.

Make a loop with the cord and have the cord ends facing each other,

lying next to each other. Using smaller pieces of RW to secure the ends

of cord to top of egg. Then continue on and cover the entire egg with a

layer RW. For hat band, cut the 8” piece of RW in half length-wise.

Next fold the piece in half length-wise, dip in water and place around

head (egg) and smooth. For ears and nose scrunch up a wet piece of

RW and shape with finger tips, press in place, and smooth.

Hang to dry.

Paint head and face while holding hat, let dry.

Paint hat while holding face, let dry.

Trim hat band with glue and glitter let dry.

While hanging glue pom-pom to top of hat.

Let dry

Tip: Make a place to hang your ornament at your workspace,

so it can hang to dry in-between the different steps


Felt Elf Christmas Ornament

Red Felt; 4″ x 7″ piece

Green Felt; 4 1/2″ x 2″ piece

Flesh colored felt: 3 1/2″ x 9″ piece

One 10mm bell

One 5mm pink pom-pom

Two black glass E beads

Tacky glue

Small amount Polyester Fiberfill (stuffing)

8″ piece of elastic thread or crochet thread

Powdered blush

Ultra fine tip black permanent marker

Needle & thread

optional: sewing machine and gold glitter glue

or fabric paint in a squeeze bottle

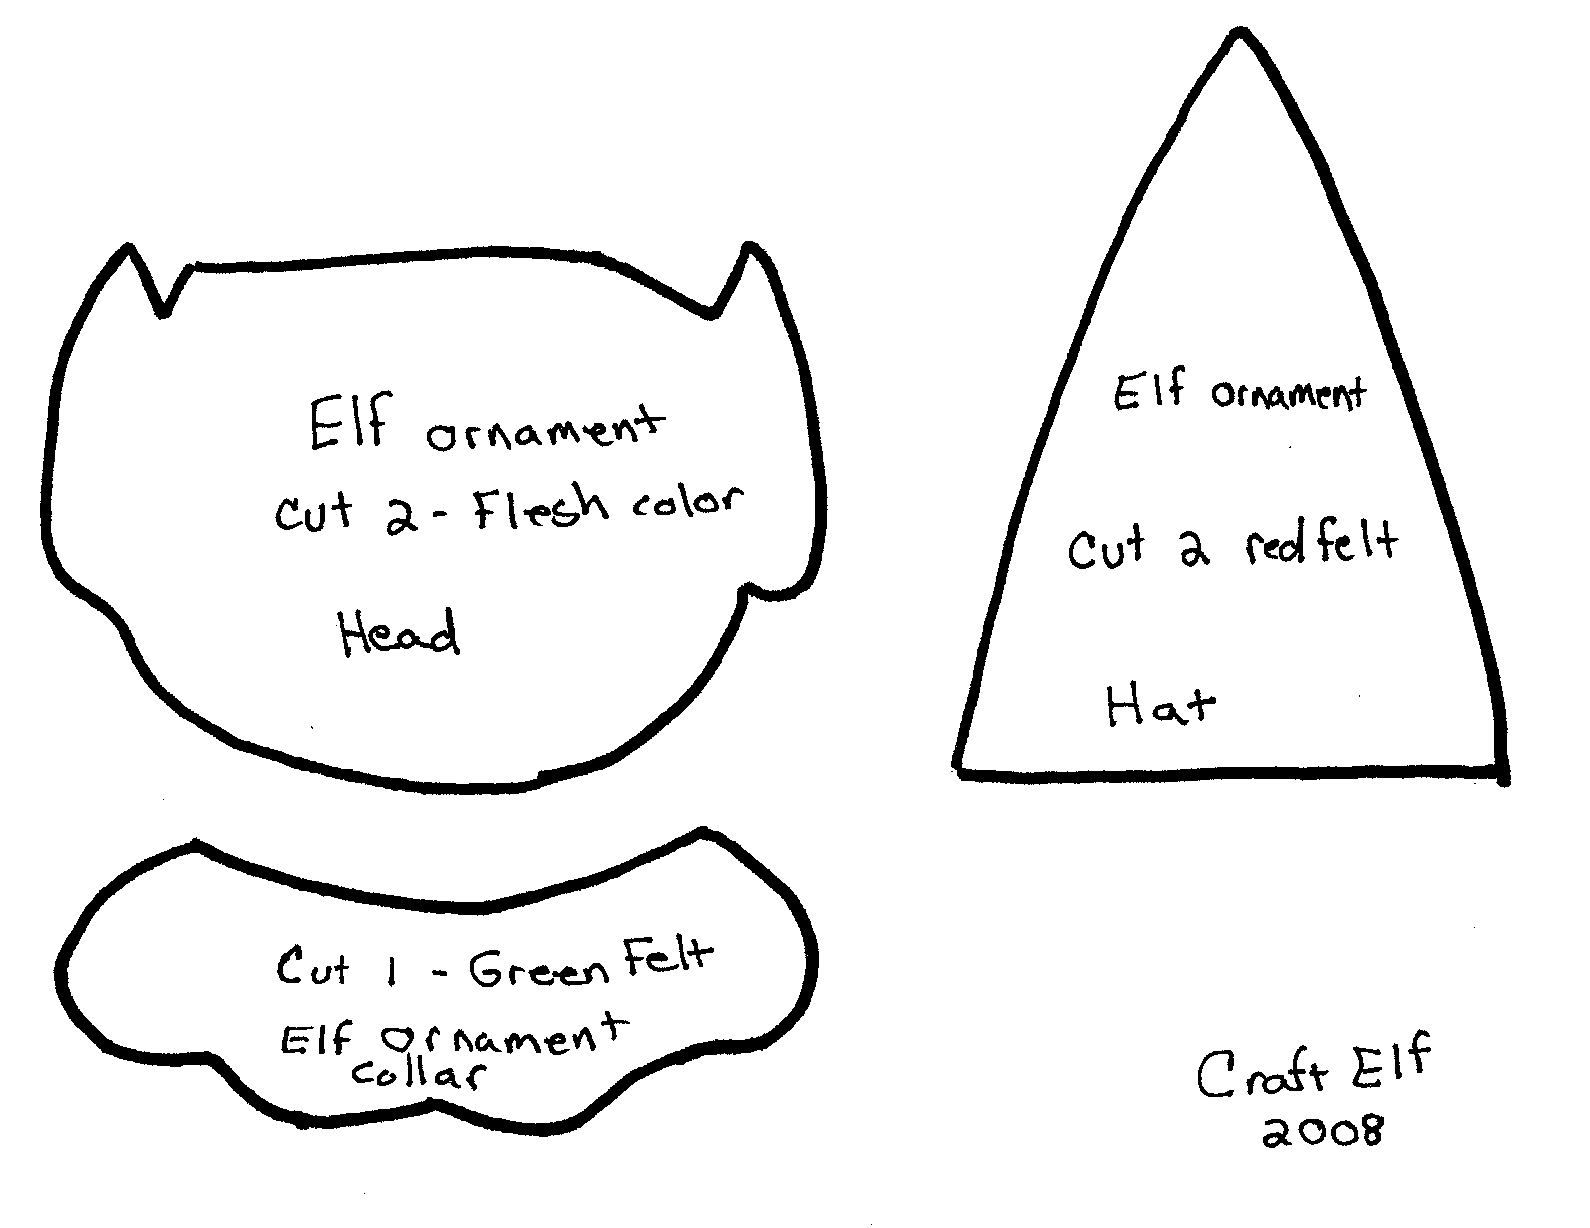
Trace and cut out two hat pieces from red felt.

Trace and cut out one collar piece from green felt and

trace and cut out two heads from flesh colored felt.

Pin the two head pieces together and sew around the

face close to the edge leaving the top section opened.

Topstitch around the ears.

Stuff the head with Polyester Fiberfil (stuffing).

Only the face will be stuffed - the ears will not get stuffed.

Then, sew the opening at the top of the head closed. Set aside.

Pin the two hat sections together and stitch the two sides

close to the edge leaving the bottom edge opened.

Right side out the hat and place it on top of the elf’s head.

Stitch in place.

Fold down the top of the hat as pictured and tack

in place with a couple of stitches on the back side of the ornament.

Sew a bell to the tip of the hat.

Hand-stitch the collar to the lower portion of the head.

Brush powdered blush on the cheeks of the elf.

Sew the two black beads on for eyes. Glue the pink

pom-pom on as the nose and using the permanent marker,

draw a mouth.

Thread a piece of elastic thread or crochet thread

through the back of the elf’s hat using a needle with

an eye large enough to pass the thread through.

Remove the needle and tie the ends in an overhand knot.

This will be your ornament’s hanger.

Optional: Personalize your ornament by writing the recipients

name on the collar using the glitter glue or fabric paint in a squeeze bottle.

Thursday, August 21, 2008

Another great how to from eHow

How to Make Gingerbread Cookies

How to Make Gingerbread Cookies

Introduction

Gingerbread has become synonymous with Christmas. This year, try baking your own gingerbread cookies.

Instructions

Difficulty: Moderately Easy

Steps

Step One

Gather ingredients. You will need 5 c. sifted all-purpose flour, 1 tsp. ground cinnamon, 2 tsp. baking powder, 1 1/2 tsp. each ground ginger and ground cloves, 1 tsp. baking soda, 1 tsp. ground nutmeg, 1 tsp. salt, 2 sticks unsalted butter, 1 c. sugar, 2 eggs, 1 c. molasses, and 2 tbsp. water.

Step Two

Mix butter and sugar until creamy.

Step Three

Add eggs, molasses and water. Mix well.

Step Four

Mix the dry ingredients together.

Step Five

Blend the dry ingredients into the butter mixture.

Step Six

Chill for at least three hours or overnight.

Step Seven

Roll out dough onto lightly floured cookie sheet.

Step Eight

Using cookie cutters, cut out shapes.

Step Nine

Place cookies about an inch apart on the cookie sheet and bake for five minutes at 375 degrees.

Step Ten

Cool on rack and then decorate cookies.

Tips & Warnings

  • There are many variations on the gingerbread recipe. This one is a basic way to get started. Add more ginger and cinnamon for spicier cookies, more sugar for sweeter cookies, or more butter or shortening for moister cookies.

Overall Things You'll Need

Wednesday, August 20, 2008

How to from ehow.com

Ginberbread Man

Gingerbread Man

Introduction

I love Christmas and there are so many crafts you can do with the kids from toddlers and up like paper gingerbread men!

Instructions

Difficulty: Easy

Things You'll Need

Steps

Step One

cut out a gingerbread man shape with brown construction paper.

Step Two

cut out a larger gingerbread man with red construction paper with scissors that have zig zag or deckle edges.

Step Three

Have the kids glue the brown gingerbread man on top of the red gingerbread man

Step Four

Bring out different craft pieces like googly eyes, stickers, piper cleaners and buttons.

Step Five

You can also cut out eyes or pieces to make a vest and shorts or color with markers.

Step Six

Decorate and get creative! You can add glitter, cut a hole on top and make yarn loop and hang on the tree or window.

Overall Tips & Warnings

  • When doing crafts with toddlers this is a great time to encourage independence and creativity and simple crafts like this gingerbread man give you just that opportunity to let them go on their own.
  • Make sure you are using safety scissors if you allow them to cut any part of the craft.

Saturday, August 9, 2008

how to from BHG.com


Make a Ribbon Candy Twist Ornament

Wow family and friends with these handcrafted retro ribbon candy styled ornaments.

What You Need
  • Spray adhesive
  • Wide, medium, and narrow ribbon
  • Water-soluble marking pen
  • Long-eye beading needle
  • White embroidery floss
  • Eleven 10-mm-round pearls

How to Make It
  1. Glue the medium-width ribbon to the center of the wide ribbon.
  2. Trim the length to measure 16 1/2 inches.
  3. Using the pen and a ruler, mark dots down the center of the ribbon at 1-1/2-inch intervals on both sides of the ribbon.
  4. Thread the beading needle with an 18-inch length of embroidery floss.
  5. Slip a pearl onto the floss.
  6. Carefully remove the needle, and then rethread it with both ends of the floss. The ends of the floss should be even.
  7. Push the needle from one side of the ribbon through the other side at the first mark (the first pearl is now at the bottom of the ornament); add a pearl.
  8. Push the needle from the one side of the ribbon through to the other side at the second mark; add a pearl.
  9. Continue until you have 11 pearls on the string.
  10. To finish, secure the thread and attach a hanging ribbon.

[BLOGGER'S TIP: Use Heat n' Bond adhesive to fuse ribbons together. Gives more weight and body to ribbon strip and you can delete the use of beads if you don't like the look! You can also use striped fabric fused together with Heat n' Bond and then make long strips to fold into ornaments!]