

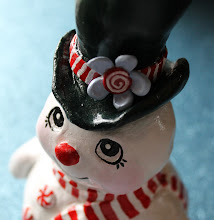
[Here are a couple of craft projects mined off of the net. Above is a cute ornament I found a picture of on Flickr, I will try to come up with directions on how to make it when time permits!! There should be links back to the original sites on all the photos, if not please let me know because I believe in giving props to those who have created all the little lovelies I find!!]

Activa Elf Ornament This little guy will add a touch of holiday whimsy to your tree. Designed by Jill MacKay
4” Roll of Rigid Wrap®
3 “ Styrofoam Egg
Red Glitter
Red Pom-Pom
Acrylic Paint: Red, Green, Peach and Black
Piece of Craft Cord- 6”
Paintbrush
Glue
Container for Water
Plastic to Cover Workspace
Scissors
Cut several strips of Rigid Wrap® (RW) of various sizes ranging from
½” to 1 ½”, Cut one 8” long strip.
Make a loop with the cord and have the cord ends facing each other,
lying next to each other. Using smaller pieces of RW to secure the ends
of cord to top of egg. Then continue on and cover the entire egg with a
layer RW. For hat band, cut the 8” piece of RW in half length-wise.
Next fold the piece in half length-wise, dip in water and place around
head (egg) and smooth. For ears and nose scrunch up a wet piece of
RW and shape with finger tips, press in place, and smooth.
Hang to dry.
Paint head and face while holding hat, let dry.
Paint hat while holding face, let dry.
Trim hat band with glue and glitter let dry.
While hanging glue pom-pom to top of hat.
Let dry
Tip: Make a place to hang your ornament at your workspace,
so it can hang to dry in-between the different steps
|
|
Felt Elf Christmas Ornament

Red Felt; 4″ x 7″ piece
Green Felt; 4 1/2″ x 2″ piece
Flesh colored felt: 3 1/2″ x 9″ piece
One 10mm bell
One 5mm pink pom-pom
Two black glass E beads
Tacky glue
Small amount Polyester Fiberfill (stuffing)
8″ piece of elastic thread or crochet thread
Powdered blush
Ultra fine tip black permanent marker
Needle & thread
optional: sewing machine and gold glitter glue
or fabric paint in a squeeze bottle
Trace and cut out two hat pieces from red felt.
Trace and cut out one collar piece from green felt and
trace and cut out two heads from flesh colored felt.
Pin the two head pieces together and sew around the
face close to the edge leaving the top section opened.
Topstitch around the ears.
Stuff the head with Polyester Fiberfil (stuffing).
Only the face will be stuffed - the ears will not get stuffed.
Then, sew the opening at the top of the head closed. Set aside.
Pin the two hat sections together and stitch the two sides
close to the edge leaving the bottom edge opened.
Right side out the hat and place it on top of the elf’s head.
Stitch in place.
Fold down the top of the hat as pictured and tack
in place with a couple of stitches on the back side of the ornament.
Sew a bell to the tip of the hat.
Hand-stitch the collar to the lower portion of the head.
Brush powdered blush on the cheeks of the elf.
Sew the two black beads on for eyes. Glue the pink
pom-pom on as the nose and using the permanent marker,
draw a mouth.
Thread a piece of elastic thread or crochet thread
through the back of the elf’s hat using a needle with
an eye large enough to pass the thread through.
Remove the needle and tie the ends in an overhand knot.
This will be your ornament’s hanger.
Optional: Personalize your ornament by writing the recipients
name on the collar using the glitter glue or fabric paint in a squeeze bottle.


No comments:
Post a Comment