Sunday, August 31, 2008

From Bronner's

Christmas Tree Decorating Tips
[ALL INFORMATION FROM BRONNERS IS COPYRIGHTED 2008 BY BRONNERS AND ITS INCLUSION ON THIS BLOG IS INTENDED FOR YOUR PERSONAL INFORMATION ONLY ( DON'T USE IT FOR ANY NEFARIOUS PURPOSE!!!) AND VISIT THEIR SITE!!! THE ENTIRE POST IS ONE BIG FANTASTIC LINK!!]

Tree decorating themes vary widely according to individual tastes. Many people like to decorate with a specific color or color combination. Here are a few basic tips, which may be helpful to you. The suggested sequence for decorating a tree is as follows:

  1. Lights
  2. Garland
  3. Tree Trims
  4. Ornaments
  5. Tree Top and Skirts

Tree Trim Tips

Tree Height
35 to 40 24" to 3' 30 pieces
70 to 80 36" to 4' 42 pieces
200 to 400 50' to 55" 35-50 pieces
400 to 600 85' to 90' 50-75 pieces
500 to 700 100' to 110' 75-100 pieces
600 to 800 130' to 145' 175-225 pieces
800 to 1000 185' to 200' 200-300 pieces


Regular Doorway
18' to 25'
Double Doorway
20' to 35'
Small Picture Window
18' to 25'
Large Picture Window
20' to 35'
Fireplace Mantle
18' to 25'
Ceiling Decorations
50' to 100'

C-7 & C-9 Lights*:

To calculate the amount of C-7 and C-9 lights for your tree, you may want to do the following:

HxD (divided by 2) for trees up to 7 feet.
HxD (divided by 3) for trees 7 1/2 feet and up.

For example, a 6 foot tree with a diameter of 45 inches would be as follows:

6x45 (divided by 2) = 135 lights

*Not all C-7 and C-9 lights are approved for artificial trees, but Cool Bright by GE is a good choice. Check packaging.

Do's and Don'ts of Lights:

Never hook mini lights and C-7s or C-9s end to end. Connect only the same light sets together. They must be on their own outlet. This is also true when hooking your treetop to your light sets. the 3 outlet cords work very well in this situation. Do not hook more than 3 sets of lights together end to end. This can cause overloaded circuits and may blow fuses in your light sets. Some lights are commercial grade and you can connect up to six lights together. (Check packaging). Discard damaged sets (broken/cracked sockets, frayed/bare wires or loose connectors). Turn off all indoor lights on trees and other decorations when you go to bed or leave the house.

Friday, August 29, 2008

Another on-going project!

My Christmas Tree skirt!
Starlight mints!(my Favorite) I have many more mints to make. I'm hand-stitching everything so it's taking me awhile to get it done!So far so good!

Thursday, August 21, 2008

My first project - the first finshed ornaments


I have other 'gingerbread' ornaments I'm working on but these were my first few. Finished but missing hangers. I can't wait 'til I get to the snowflakes!

Another great how to from eHow

How to Make Gingerbread Cookies

How to Make Gingerbread Cookies

Introduction

Gingerbread has become synonymous with Christmas. This year, try baking your own gingerbread cookies.

Instructions

Difficulty: Moderately Easy

Steps

Step One

Gather ingredients. You will need 5 c. sifted all-purpose flour, 1 tsp. ground cinnamon, 2 tsp. baking powder, 1 1/2 tsp. each ground ginger and ground cloves, 1 tsp. baking soda, 1 tsp. ground nutmeg, 1 tsp. salt, 2 sticks unsalted butter, 1 c. sugar, 2 eggs, 1 c. molasses, and 2 tbsp. water.

Step Two

Mix butter and sugar until creamy.

Step Three

Add eggs, molasses and water. Mix well.

Step Four

Mix the dry ingredients together.

Step Five

Blend the dry ingredients into the butter mixture.

Step Six

Chill for at least three hours or overnight.

Step Seven

Roll out dough onto lightly floured cookie sheet.

Step Eight

Using cookie cutters, cut out shapes.

Step Nine

Place cookies about an inch apart on the cookie sheet and bake for five minutes at 375 degrees.

Step Ten

Cool on rack and then decorate cookies.

Tips & Warnings

  • There are many variations on the gingerbread recipe. This one is a basic way to get started. Add more ginger and cinnamon for spicier cookies, more sugar for sweeter cookies, or more butter or shortening for moister cookies.

Overall Things You'll Need

snow globe

Wednesday, August 20, 2008

How to from ehow.com

Ginberbread Man

Gingerbread Man

Introduction

I love Christmas and there are so many crafts you can do with the kids from toddlers and up like paper gingerbread men!

Instructions

Difficulty: Easy

Things You'll Need

Steps

Step One

cut out a gingerbread man shape with brown construction paper.

Step Two

cut out a larger gingerbread man with red construction paper with scissors that have zig zag or deckle edges.

Step Three

Have the kids glue the brown gingerbread man on top of the red gingerbread man

Step Four

Bring out different craft pieces like googly eyes, stickers, piper cleaners and buttons.

Step Five

You can also cut out eyes or pieces to make a vest and shorts or color with markers.

Step Six

Decorate and get creative! You can add glitter, cut a hole on top and make yarn loop and hang on the tree or window.

Overall Tips & Warnings

  • When doing crafts with toddlers this is a great time to encourage independence and creativity and simple crafts like this gingerbread man give you just that opportunity to let them go on their own.
  • Make sure you are using safety scissors if you allow them to cut any part of the craft.

Thursday, August 14, 2008

My Christmas Craft Projects!

Here's a photo of all my supplies for the upcoming Christmas season! There will be some stamping, ornaments, a cookie plate for Santa. I don't know what I'm doing with the ribbon, I just thought it was cute!! I have other supplies but they wouldn't fit!! I'll post photos when I finish something!

Monday, August 11, 2008

How to from manggy.blogspot.com/

Thick and Chewy Gingerbread Cookies


Thick and Chewy Gingerbread Cookies (with title)

[Blogger's note: The original post is taken from manggy.blogspot.com. The cookie title
above this picture is an active link and will take you to the original post with comments. Great Blog! Check it out!]

I'll apologize in advance for appearing to be born from another planet, but I've never had an honest-to-goodness gingerbread cookie before. I had a glazed, slightly spicy cookie before, but it tasted more like a Dunkin Donuts' Choco Honey Dipped, for some reason. Maybe it was. So after years of wondering, I was suddenly in the mood for something I thought maybe both kids and adults would like. Imagine my dismay when I learned that most gingerbread cookies were quite hard and only good for making houses and tree ornaments. I realize they're not exactly the same, but I had a gingersnap made by Fibisco that almost took my diamond-like (in hardness, heh) teeth out. Next! But a gem somehow landed in my lap: Cook's Illustrated recipe, which addressed these problems. Given that I hadn't made dessert in a while (and cookies in an even longer while), it was a Godsend. It even has instructions for when you want thin cookies for ornaments. So happy holiday baking, everyone! Get to it! (Okay, Thanksgiving first for those of you who celebrate.) This is my contribution to Susan of Food Blogga's Eat Christmas Cookies blogging event and Zlamushka's Spicy Kitchen's A Spoonful of Christmas blogging event.
Thick and Chewy Gingerbread Cookies
The problem was, there was only one supermarket in Manila that sold molasses. What the?!?! I went to Robinson's, Megamall, Hi-Top, Landmark, and Rustan's (several branches). Only Unimart had both local and imported brands. I chose an imported unsulphured brand (Grandma's Mild), since it's my first time and I wanted to be sure I got the unsulphured variety (the local brand didn't specify). I hear they have tons of wholesale baking supplies at Quiapo, where the fruitcake-mass-producing types get their molasses by the liter. I wasn't sold on that since generic fruitcake is not at all that enticing. (Recipe follows)
The recipe I wrote down here has 3 different methods: first by hand (which is what I used-- what use is having arm muscles, heh), then by stand mixer with paddle, and by food processor. I've also included weight measurements for those so inclined. Enjoy!
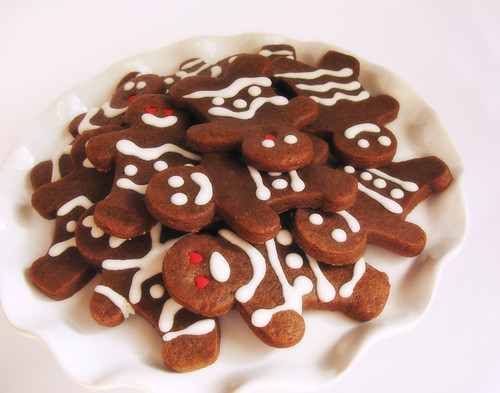
Thick and Chewy Gingerbread Cookies (adapted from Cook's Illustrated)
  • 3 cups (425g) all-purpose flour, preferably unbleached

  • 3/4 cup (150g) firmly packed dark brown sugar

  • 3/4 teaspoon baking soda

  • 1/2 teaspoon table salt

  • 1 tablespoon ground cinnamon

  • 1 tablespoon ground ginger

  • 1/2 teaspoon ground cloves

  • 1-1/2 sticks (165g) unsalted butter, cut into 12 pieces and slightly softened

  • 3/4 cup (225g) molasses (mild or full/robust, your choice, but I found mild to be quite flavorful as it was)

  • 2 tablespoons whole milk

By hand: In a small bowl, combine the molasses and milk and stir together; set aside. In a large bowl, sift together the flour, baking soda, salt, cinnamon, ginger, and cloves. Add the sugar and whisk to combine thoroughly. Scatter the butter pieces over the flour mixture and work it into the flour with a pastry blender (what I used), a fork, two knives, or a rubber spatula until it resembles very fine meal. Drizzle a third of the molasses mixture over the dough and combine with a rubber spatula (what you're doing is essentially moistening the dough). Repeat with half of the remaining molasses, then use it all up. You'll end up with a soft, cohesive dough that looks like coffee ice-cream.

By stand mixer with a paddle attachment: In a small bowl, combine the molasses and milk and stir together; set aside. In the bowl of the mixer, combine the flour, sugar, baking soda, salt, cinnamon, ginger, and cloves. Mix at low speed until combined (about 30 seconds). Scatter the butter pieces over the top and mix at medium-low speed until it resembles very fine meal (about 90 seconds). Reduce the speed to low and drizzle in the molasses mixture with the mixer running and mix until the dough is moistened thoroughly (about 20 seconds), then increase the speed to medium and mix for 10 seconds more to combine.

By food processor: In a small bowl, combine the molasses and milk and stir together; set aside. Process the flour, sugar, baking soda, salt, cinnamon, ginger, and cloves until combined (about 10 seconds). Scatter the butter pieces over the top and process until it resembles fine meal (about 15 seconds). With the machine running, drizzle in the molasses mixture and process until the dough is evenly moistened and forms a soft mass (about 10 seconds).

Continue here for all methods: Cut out at least 4 parchment rectangles to fit the bottom of your sheet pans. Scrape dough onto a work surface and divide into 2 (I used a scale to be accurate: I divided it into 2-502g masses). Place each dough half onto its own parchment rectangle and cover each with another parchment rectangle. Pat out each with your fingers through the parchment into a rough rectangle, then roll each into an even 1/4-inch thickness sandwiched in between the 2 parchment sheets (one way to get an even thickness is to use magazines of the appropriate thickness on both ends of your rolling pin as a guide-- Bon Appetit is one such magazine). Stack the dough sheets (still intact in their parchment sandwiches) onto a sheet pan and freeze until firm, about 20 minutes, or refrigerate 2 hours or overnight.

Place a rack in the upper and lower-middle positions of your oven and preheat to 350°F (177°C). Line 2 sheet pans with parchment paper (I just used the ones on my dough sheets, to conserve paper, no problem). Remove a dough sheet from the fridge and peel off the top parchment sheet, gently lay it back on the dough and put another sheet pan on top. Flip the whole set-up over and peel off then discard the other parchment sheet. Using a 3- or 5-inch gingerbread person cutter or a 3-inch cookie cutter, cut out shapes and transfer to the lined sheet pans, leaving 3/4 inch space in between. Bake the cookies for 8 minutes (for 3-inch people, which is what I used), or 8-11 minutes (for 5-inch people or 3-inch cookies), rotating the pans front to back and top to bottom halfway through. You're looking for set centers and for the dough to barely retain an imprint when touched gently with a fingertip. Don't overbake! They will set some more while cooling. Cool the cookies for 2 minutes on the pans then transfer with a wide metal spatula to a cooling rack.

Gather the scraps and repeat the rolling and cutting, chilling the dough again if it's become too soft. I was able to juggle all my rolling and cutting in advance so I can bake them consecutively. The yield is 25 3-inch people, 20 5-inch people, or 30 3-inch cookies. Best if eaten within a week.

For thin, crisp cookies that can be used as ornaments:
Divide the dough into 4 and roll out into an even 1/8-inch thickness. Bake at 325°F (163°C) oven until slightly darkened and firm in the center when pressed, 15-20 minutes for 5-inch gingerbread people.

Royal Icing for Decoration:
  • 1 pasteurized egg white

  • 1 teaspoon lemon juice

  • (at least) 1-1/2 cups (165g) confectioner's sugar

Using a mixer with a whisk attachment, beat together the egg white and lemon juice until frothy. Sift in all the confectioner's sugar and beat until smooth. Lift the beaters and if a ribbon takes less than 5 seconds to disappear into the icing's surface or runs down the sides when spread over a cookie's edge, add more sugar, 2 tablespoons at a time. Use immediately. You can use a piping bag with a plain tip or load it into a zip-lock bag and snip off a little bit of the tip. The icing will dry and form a crust overnight. If uncomfortable with using a raw egg white due to health concerns, please consult the internet for recipes using meringue powder.

Saturday, August 9, 2008

how to from BHG.com


Make a Ribbon Candy Twist Ornament

Wow family and friends with these handcrafted retro ribbon candy styled ornaments.

What You Need
  • Spray adhesive
  • Wide, medium, and narrow ribbon
  • Water-soluble marking pen
  • Long-eye beading needle
  • White embroidery floss
  • Eleven 10-mm-round pearls

How to Make It
  1. Glue the medium-width ribbon to the center of the wide ribbon.
  2. Trim the length to measure 16 1/2 inches.
  3. Using the pen and a ruler, mark dots down the center of the ribbon at 1-1/2-inch intervals on both sides of the ribbon.
  4. Thread the beading needle with an 18-inch length of embroidery floss.
  5. Slip a pearl onto the floss.
  6. Carefully remove the needle, and then rethread it with both ends of the floss. The ends of the floss should be even.
  7. Push the needle from one side of the ribbon through the other side at the first mark (the first pearl is now at the bottom of the ornament); add a pearl.
  8. Push the needle from the one side of the ribbon through to the other side at the second mark; add a pearl.
  9. Continue until you have 11 pearls on the string.
  10. To finish, secure the thread and attach a hanging ribbon.

[BLOGGER'S TIP: Use Heat n' Bond adhesive to fuse ribbons together. Gives more weight and body to ribbon strip and you can delete the use of beads if you don't like the look! You can also use striped fabric fused together with Heat n' Bond and then make long strips to fold into ornaments!]

Welcome to our blog!


Folks are always asking me where I get my ideas and usually I google the description of what I'm thinking about making and see what comes up. I then think about how I can make the image in my mind's eye come to life. This usually involves a huge mess(just ask my frustrated husband!!) Since I don't have a technical writer to help you make my craft ideas (although I am looking for one!), I can share some really great ideas that inspire me! I hope you find them inspirational as well! At some point, with or without a technical writer, I may muster up the courage to muddle my through a 'how-to' of one of my own Christmas crafts, until then Enjoy!!